
Art of Developing Dialog Flow-driven WhatsApp Bot without External Libraries
WhatsApp has become one of the most popular messaging platforms worldwide, making it an excellent channel for building conversational bots. A Whatsapp bot can automate conversations with users on WhatsApp, providing information, answering questions, and performing various tasks such as booking appointments, sending reminders, and more. It can help businesses save time, improve customer engagement, and increase productivity. Several platforms provide WhatsApp API for businesses and developers to integrate WhatsApp messaging into their applications and services. Some of the popular ones are Twilio, MessageBird, Infobip, Sendinblue and Gupshup. These platforms charge a fee for integrating their WhatsApp API services within current business systems, which can be difficult and time-consuming for companies without in-house technological experience.
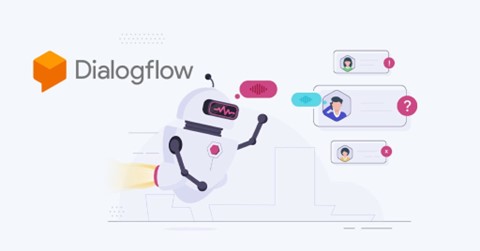
DialogFlow, powered by Google Cloud, is a powerful Natural Language Understanding (NLU) platform that allows developers to create intelligent chatbots. In this article, we will explore the art of developing a WhatsApp bot using DialogFlow without relying on external libraries, instead, we will use node packages with Dialogflow integration with WhatsApp. By leveraging the capabilities of DialogFlow, we can build a robust and efficient bot that understands user queries and provides relevant responses.
Most Effective Way to Create WhatsApp Chatbot
Environment Setup: Before diving into the development process, we need to set up our development environment. Here are the steps to be followed:
Create WhatsApp Business Account: Creating a WhatsApp Business Account will give you access to the WhatsApp Business API, which allows integration with third-party services.
Enable the WhatsApp Business API: Follow the documentation provided by WhatsApp to enable the APIs. This process involves verifying your phone number and obtaining an API key.
Set up a Dialogflow Agent: Create a new agent in Dialogflow by signing in to the Dialogflow console. Define the intents, entities, and responses that your bot will use to understand and generate appropriate responses.
Integrating WhatsApp with Dialogflow by creating a Dialogflow Agent
Creating a Dialogflow Agent
Steps to create a Dialogflow Agent:
- Sign up or log in to the Dialogflow website.
- Create a new agent.
- Build your intent by adding training phrases and actions.
- Set up entities to extract information from user input.
- Test your agent using the "Try it now" panel.
- Integrate your agent with other platforms if desired.
Developing Dialogflow Agent:
Define Intents: Intents represent the actions or tasks that users can perform. Define various intents based on the expected user queries. For example: Create an intent for checking the weather, booking a restaurant, or getting news updates.
Configure Entities: Entities are used to extract important information from user queries. Define the entities to capture relevant data such as dates, locations, or names.
Train the Agent: Train the Dialogflow agent by providing sample user queries and mapping them to the appropriate intents. Dialogflow uses machine learning algorithms to understand user input better.
Fulfilment: Enable the fulfilment feature in Dialogflow to connect to your webhook server. This allows you to handle complex logic and process user queries before generating a response.
WhatsApp-Web.js
Whatsapp-web.js is a Node.js library that allows you to interact with the WhatsApp Web API, which is the web version of the WhatsApp messaging app. It provides an interface for automating tasks such as sending and receiving messages, creating groups, and managing contacts.
The steps to create a WhatsApp-Web.js
- Install Node.js: Download Node.js from the official website and install it on your computer.
- Set up a New Project: Create a new folder for your project and navigate to it in your terminal or command prompt.
- Install WhatsApp-web.js: Run the command "npm install WhatsApp-web.js" in your terminal or command prompt to install the library.
- Set up your WhatsApp Account: Follow the instructions provided by the WhatsApp-web.js documentation to connect your account by scanning a QR code using the WhatsApp app on your mobile device.
- Start coding: Use the WhatsApp-web.js library to build your custom application, using the documentation to guide you through sending messages, creating groups, and other actions.
Utilize whatsapp-web.js to integrate WhatsApp with dialogue flow.
To build a WhatsApp bot with Node.js, you'll need the whatsapp-web.js library from the NPM registry. This library simplifies setup and makes it quick and effortless to get your bot up and running.
Here are the high-level steps to get started:
1. Create a new Dialogflow agent and populate it with the intents and entities required for your use case.
2. Next, create a new Node.js application and use npm to install the dialogflow and WhatsApp-web.js libraries.
npm install dialogflow whatsapp-web.js
3. Create a Dialogflow agent and a Dialogflow API Client service account. Create a JSON key file for the service account and keep it safe.
4. Create a Dialogflow agent and write code to authenticate the service account.
5. Because WhatsApp-web.js operates by running WhatsApp Web in the background and automating its interaction, you must first authorize the client by scanning a QR code from WhatsApp on your phone
$ npm i qrcode-terminal
6. Create a new file for your Node.js application to handle WhatsApp conversations. In this file, you may use the WhatsApp-web.js library to listen for incoming messages and the Dialogflow library to transmit the messages to Dialogflow for processing.
Here is an example of how this can be done:
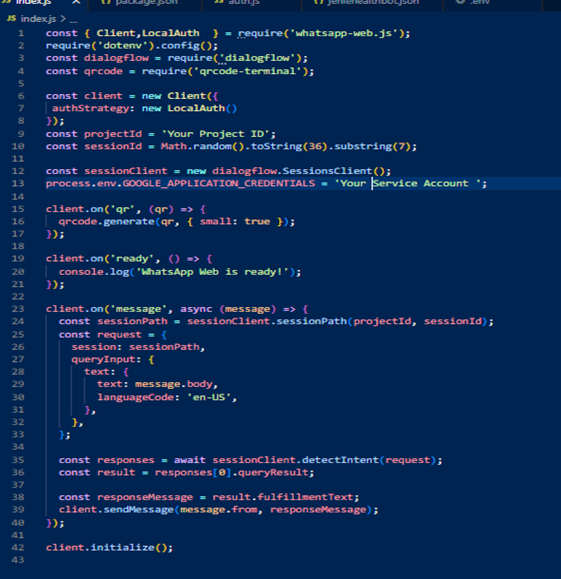
The Client object is used in this example to create a listener for incoming messages. When a message is received, it is submitted to the Dialogflow via the SessionsClient object, and the response is sent back to the user via WhatsApp via the Client object's sendMessage function.
7. Run the Node.js application and connect it to WhatsApp. Users may now submit messages to the bot's WhatsApp account, which will be processed by Dialogflow and the response delivered back to the user on WhatsApp.
There we go! You should now see something like this after running the file.

8. After scanning this QR code, the client should be authorized, and a “Client is ready!” message will be seen.
9. We can now connect to WhatsApp and begin monitoring incoming messages, a straightforward process facilitated by whatsapp-web.js. When a message is received, the client triggers a message event, indicating that we can seamlessly integrate Dialogflow with WhatsApp. The messages received come with a convenient feature that enables prompt responses using WhatsApp's Reply functionality.
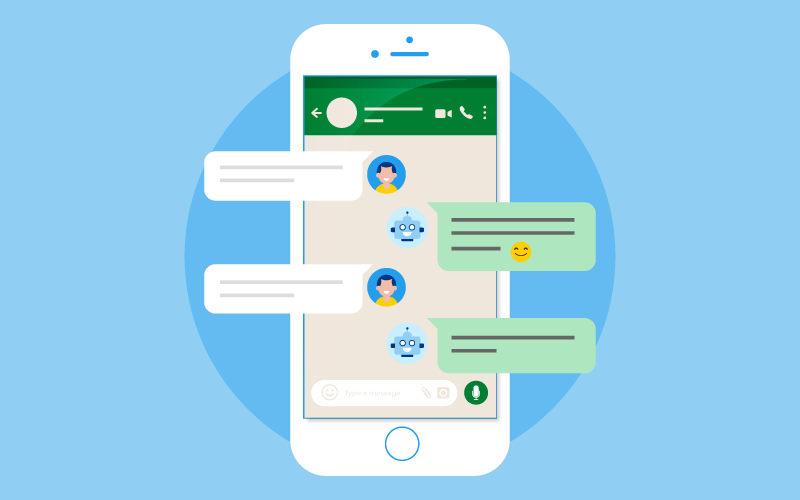
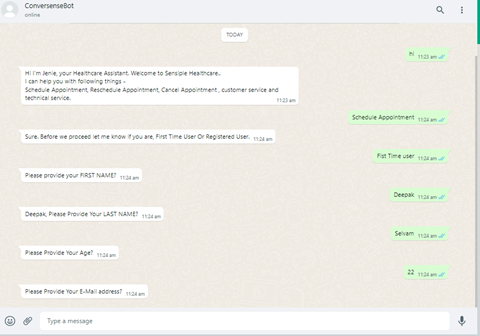
Test Output:
Conclusion
Building a WhatsApp Bot with Dialogflow and the WhatsApp Web.js library without the use of other libraries provides a strong and versatile alternative for generating conversational interactions. You can improve the chatbot's capacity to understand and reply to user inquiries by incorporating Dialogflow's natural language understanding capabilities. You can build a robust and user-friendly chatbot system with easy integration, customization possibilities, scalability, and continuous maintenance.
About the Author
 Hindhuja Selvam is a Developer at Sensiple with 2 years of expertise in the Contact Center Practice. She is well-versed in Node.js, Java, and the fundamentals of spring boot in Java.

